We’ll use OpenWeatherMap APIs as an example in this guide for ease of use. You can use your own APIs or services.
Before you start
- Estimated time: 15 minutes
- If you don’t have an AgentPass account, you can sign up here.
- If you don’t have an API key from OpenWeatherMap, you can sign up for a free account here. After signing up, you can get your API key from the API Keys page.
Step 1: Access the Console
1
Login to AgentPass Console
Navigate to console and sign in with your credentials.
Step 2: Create Your First MCP Server
1
Click Create Server
From the Servers page, click the “Create Server” button to start the server creation process.
2
Configure Server Details
Fill in the basic server information:
- Name:
My First MCP Server - Description:
A server for testing MCP integration
3
Create the Server
Click “Create Server” to finalize your MCP server setup.
Step 3: Create Your First Tool
1
Create New Tool
Now you’ve landed on the Flow Builder. Here you can create your first tool.
- Click “Create your first tool”
- Choose “Create manually” for full control
2
Configure Tool Basics
Enter the tool information: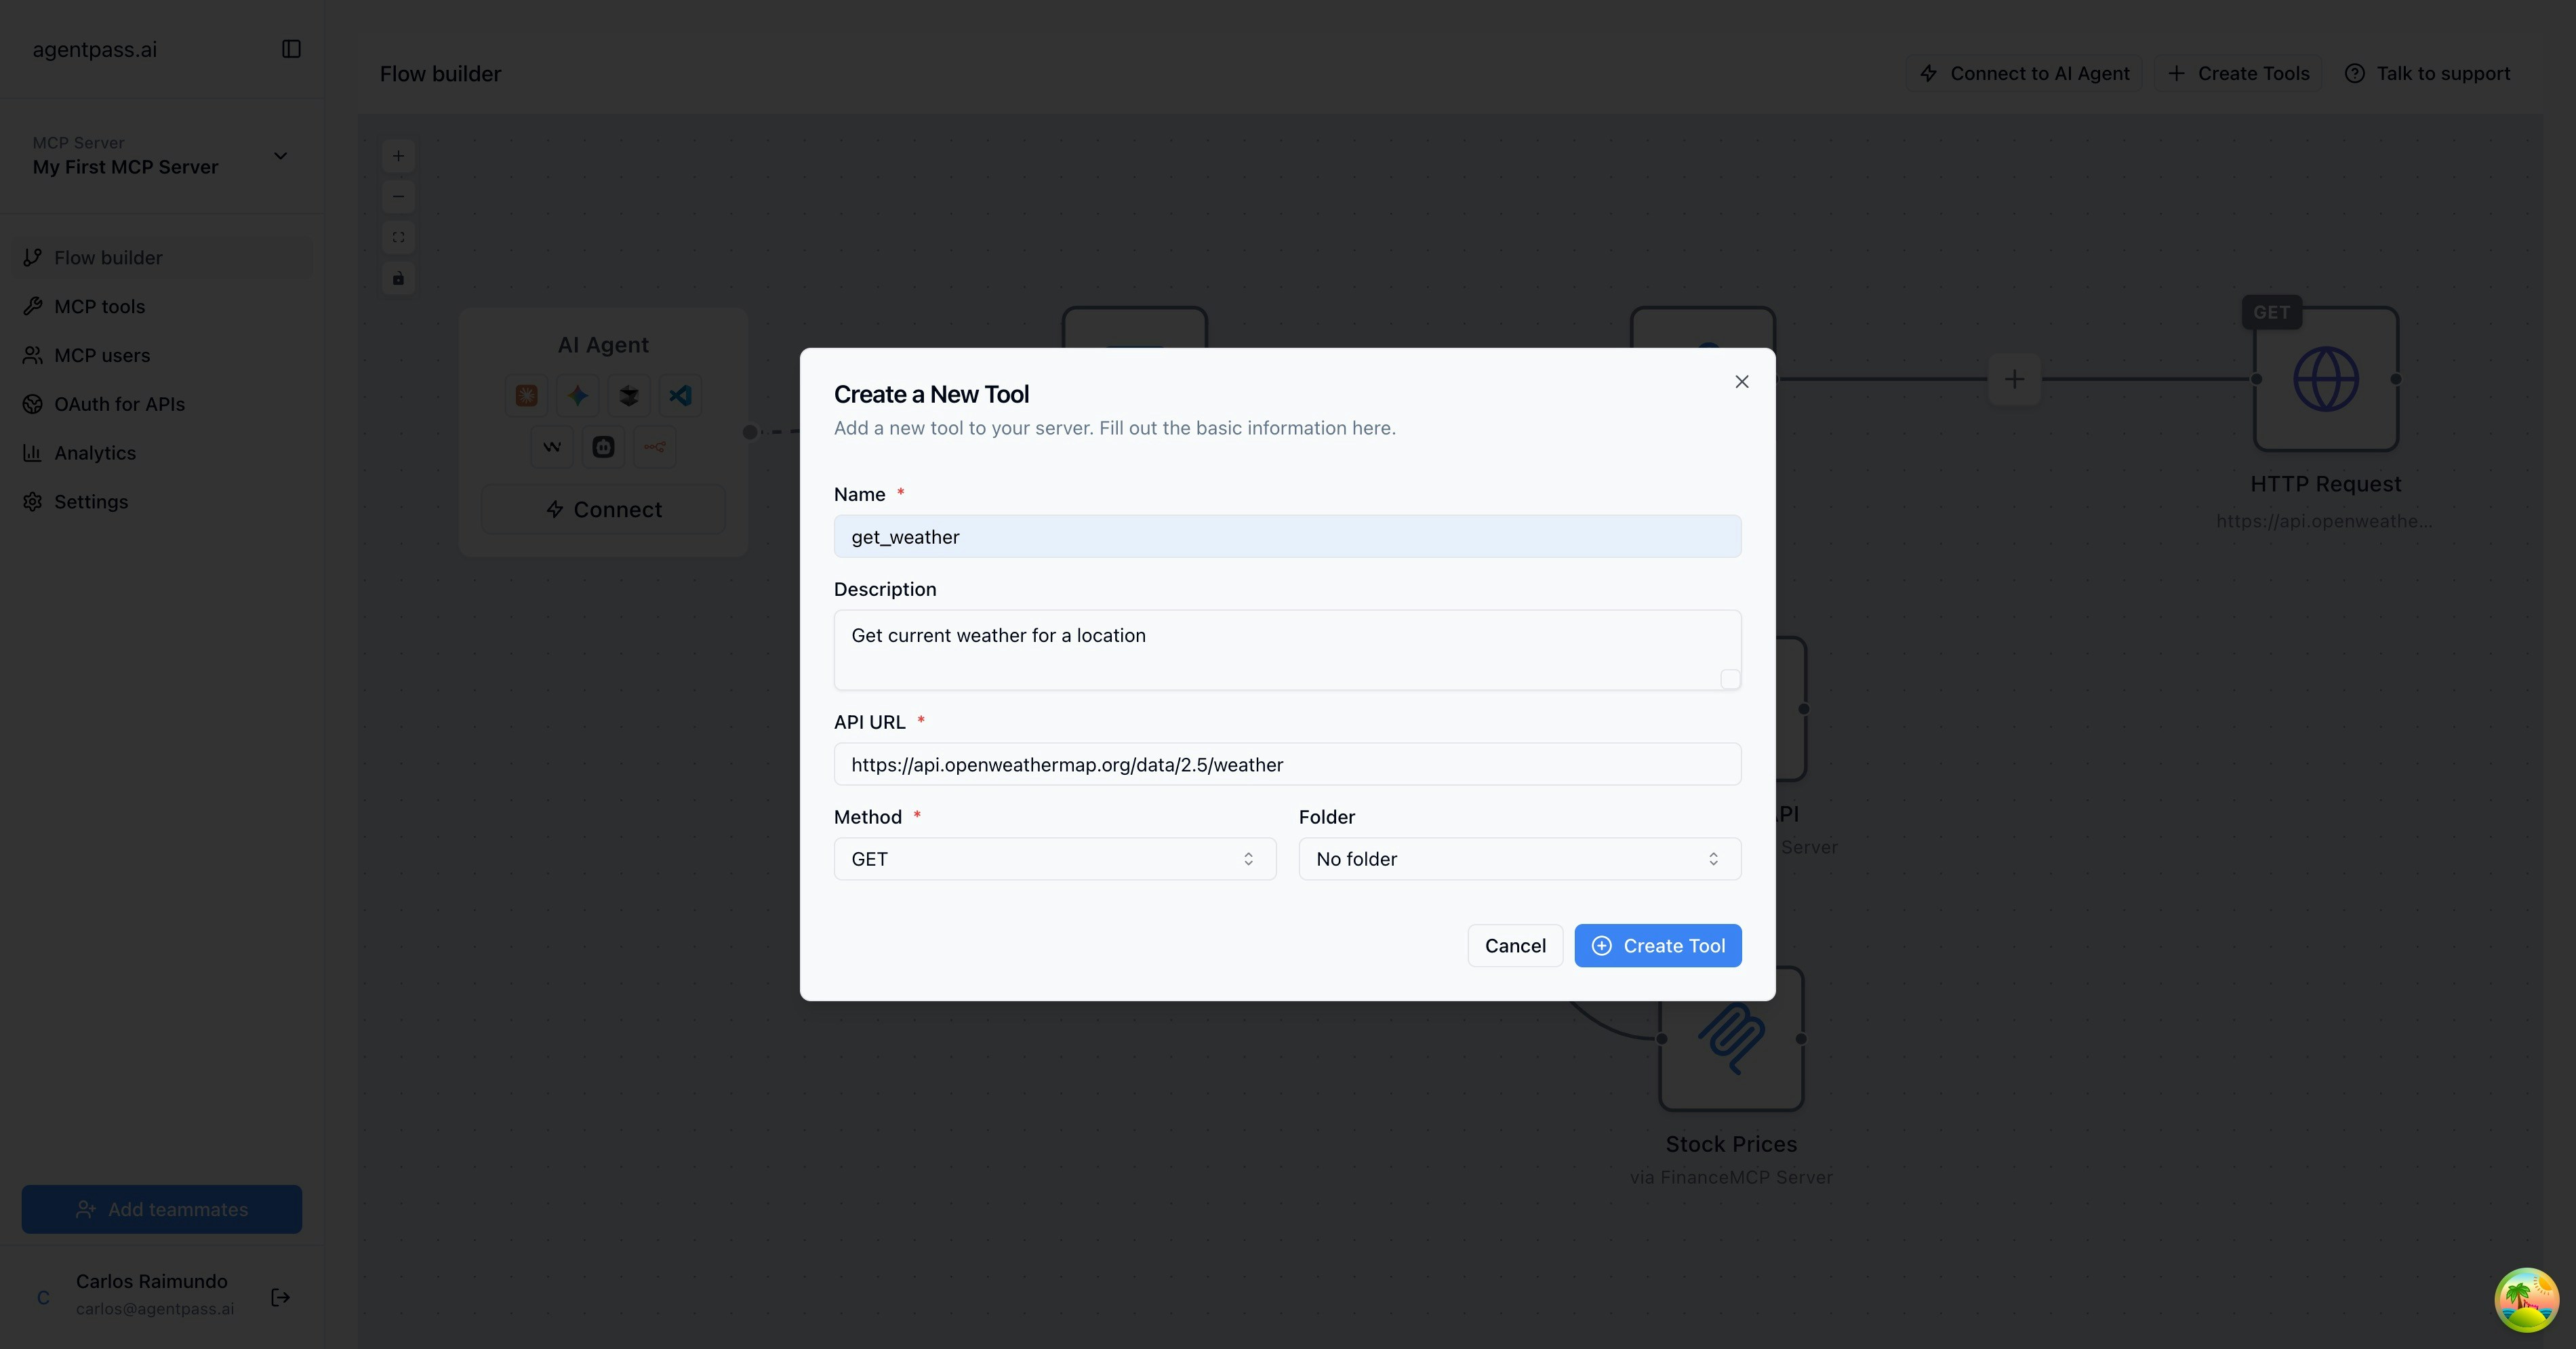
- Name:
get_weather - Description:
Get current weather for a location - API URL:
https://api.openweathermap.org/data/2.5/weather - HTTP Method:
GET - Click “Create Tool”
3
Define Parameters
In the flow builder, you can see the tool you just created.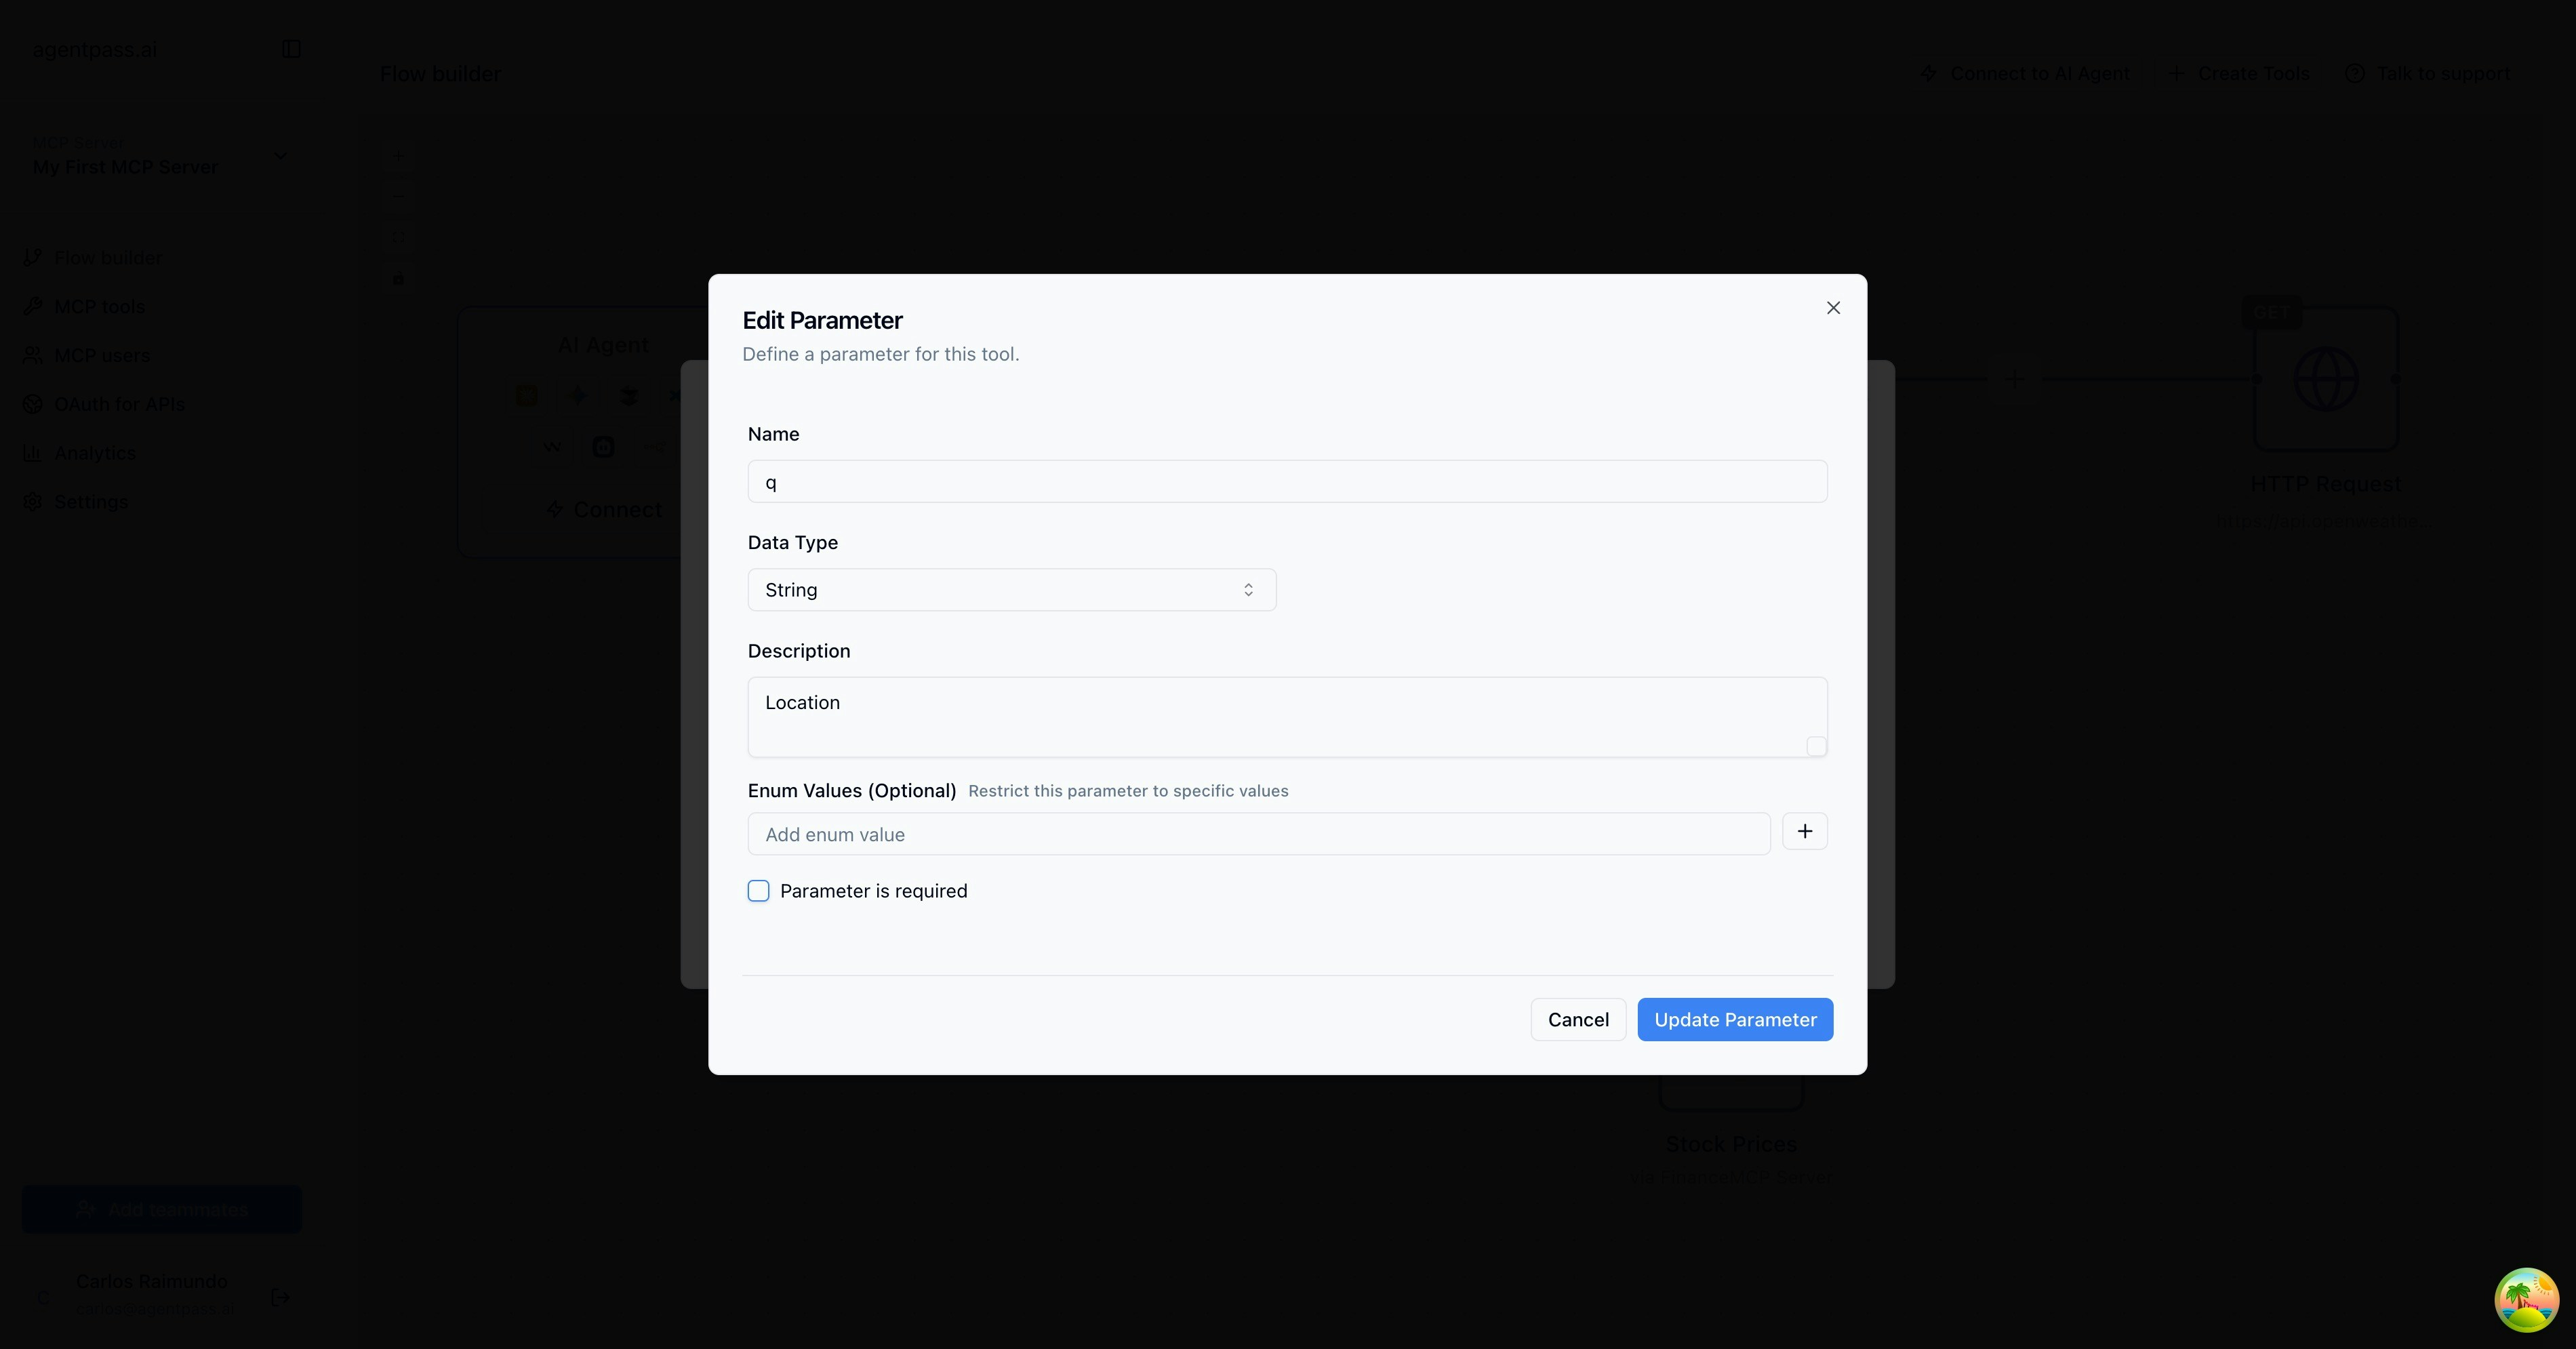
- Hover over the tool and click “Edit Tool” (pencil icon)
- Go to the Tab “Tool Parameters”
- Name:
q - Data type:
string - Description:
Location - Click “Add Parameter” and then click “Save Changes”
4
Configure HTTP Request
Move to the “HTTP Request” tab. This is where the API request will be configured.Add a new parameter (Tab Params):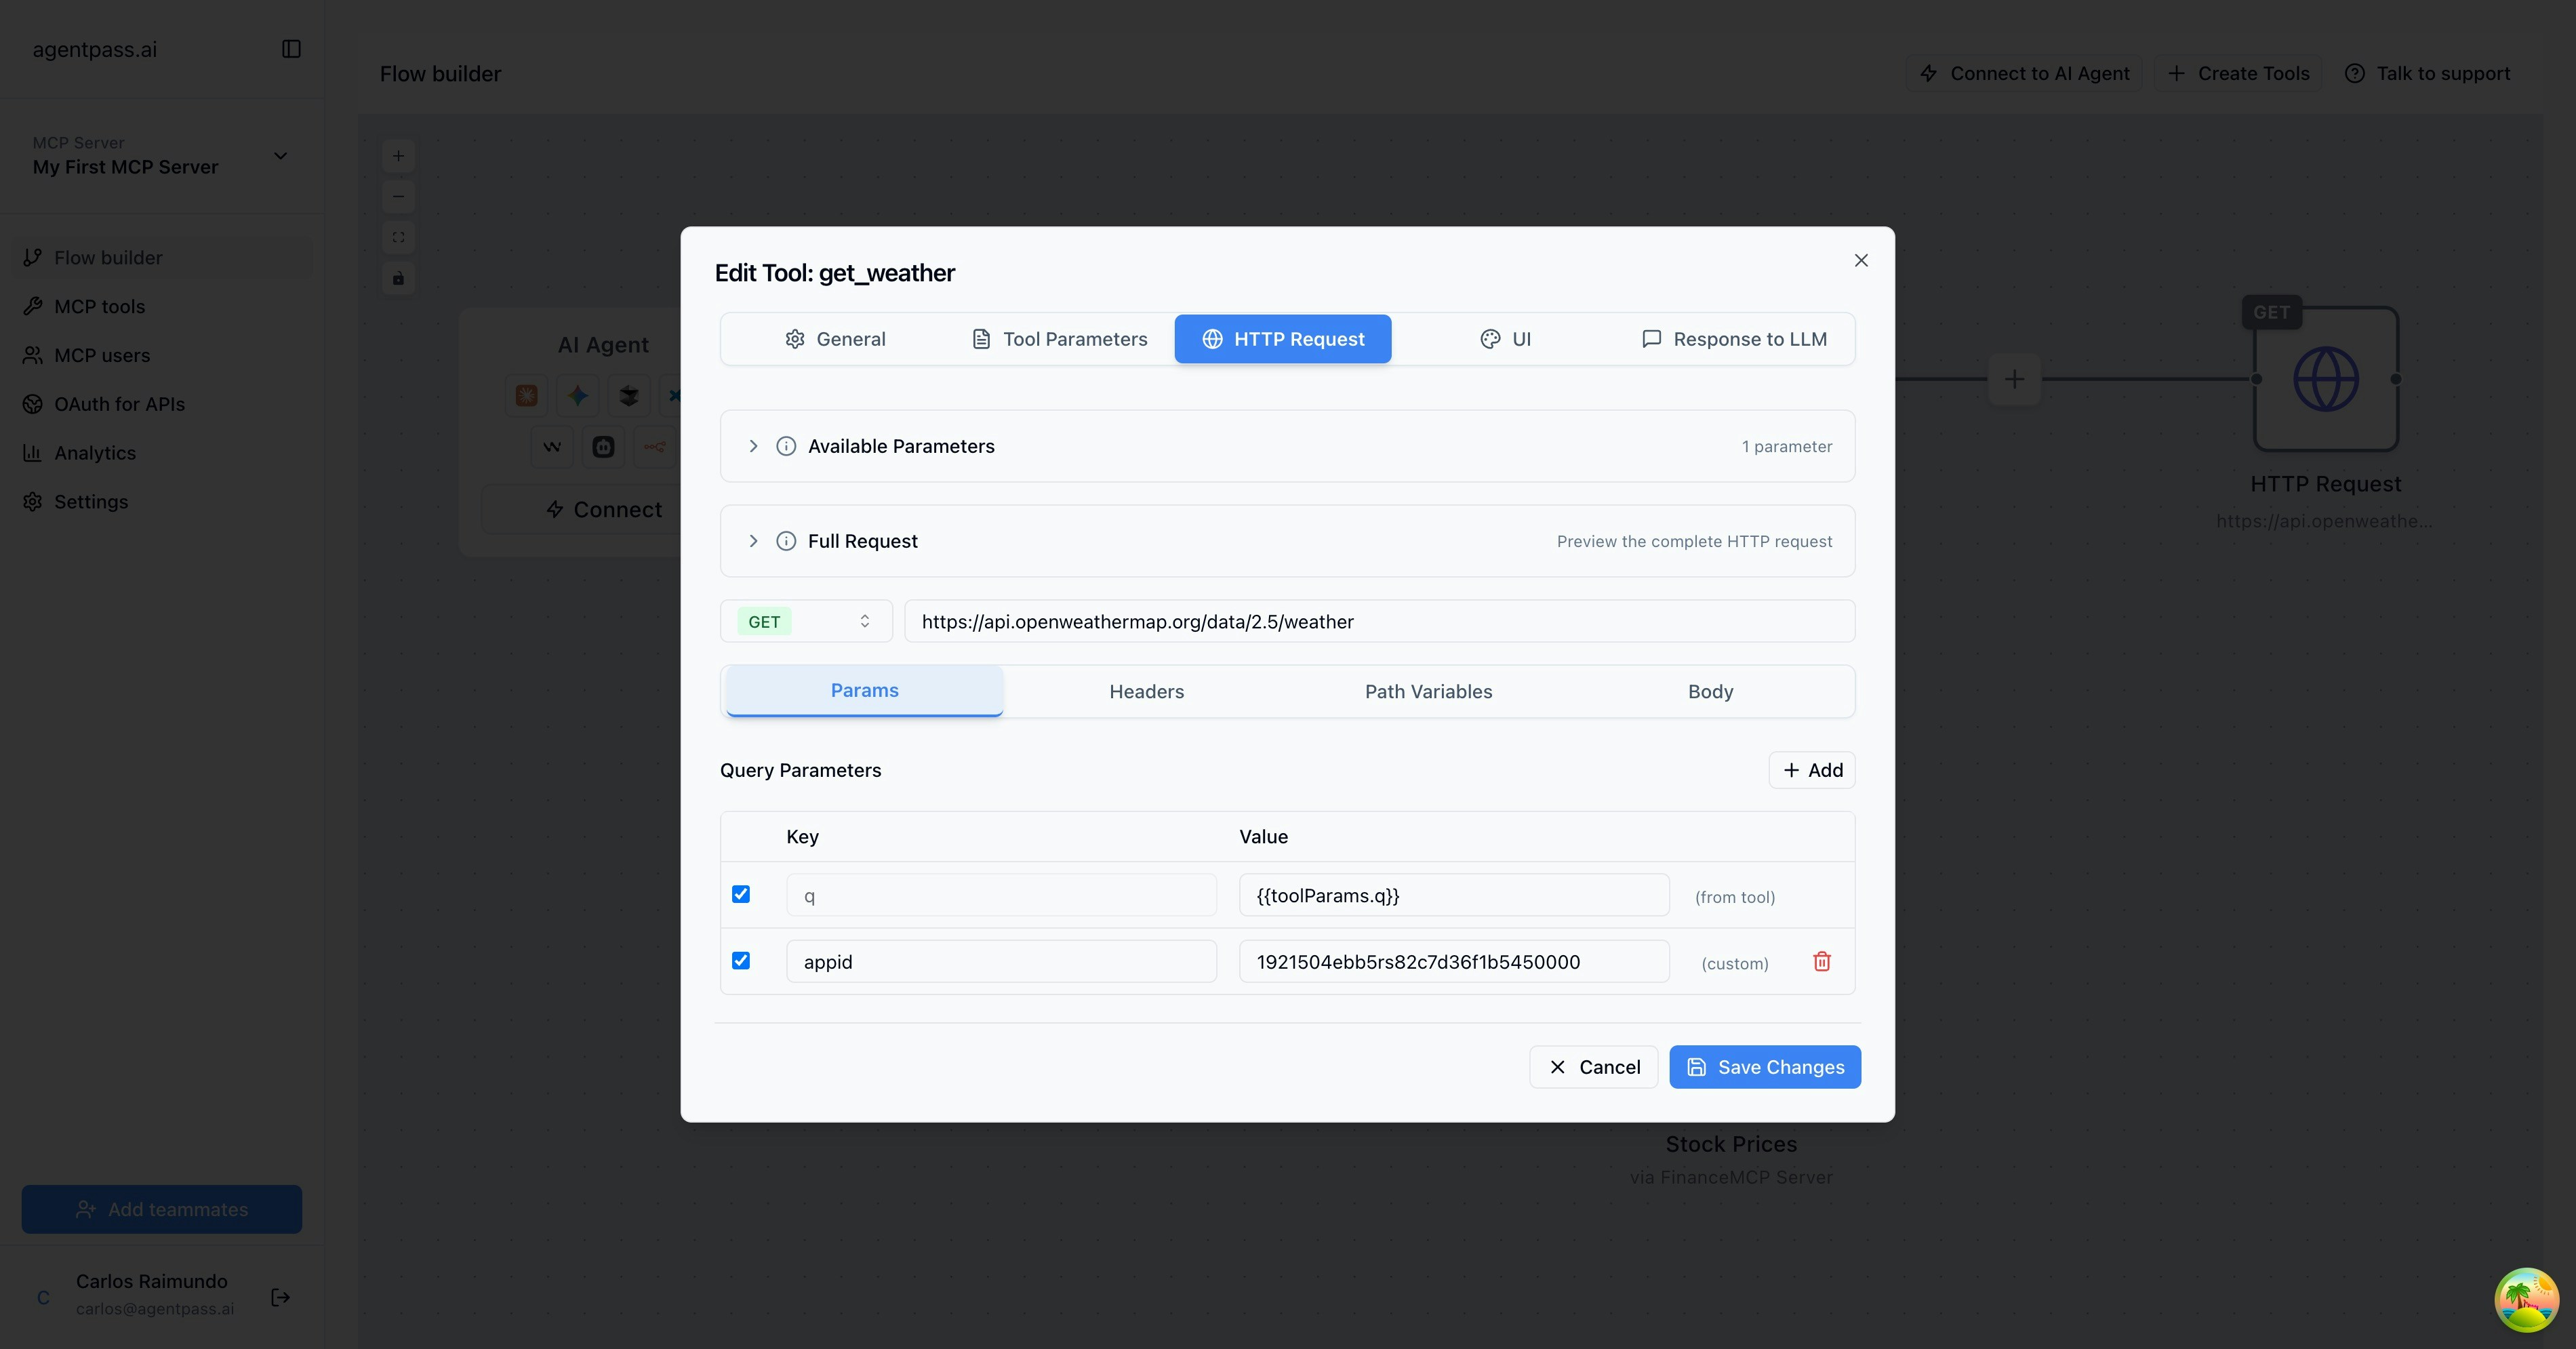
-
Name:
appid -
Value:
your-api-key(remember to replace with your actual API key) - Click “Save Changes”
Step 4: Test Your Tool
1
Access Tool Playground
From the flow builder, hover your mcp tool and click the “Test” button to open the playground.
2
Enter Test Parameters
In the playground interface:
- Enter a test value for the
locationparameter (e.g., “London”)
3
Execute Test
Click “Execute” to test your tool against the actual API.
4
Review Results
Examine the response to ensure your tool is working correctly: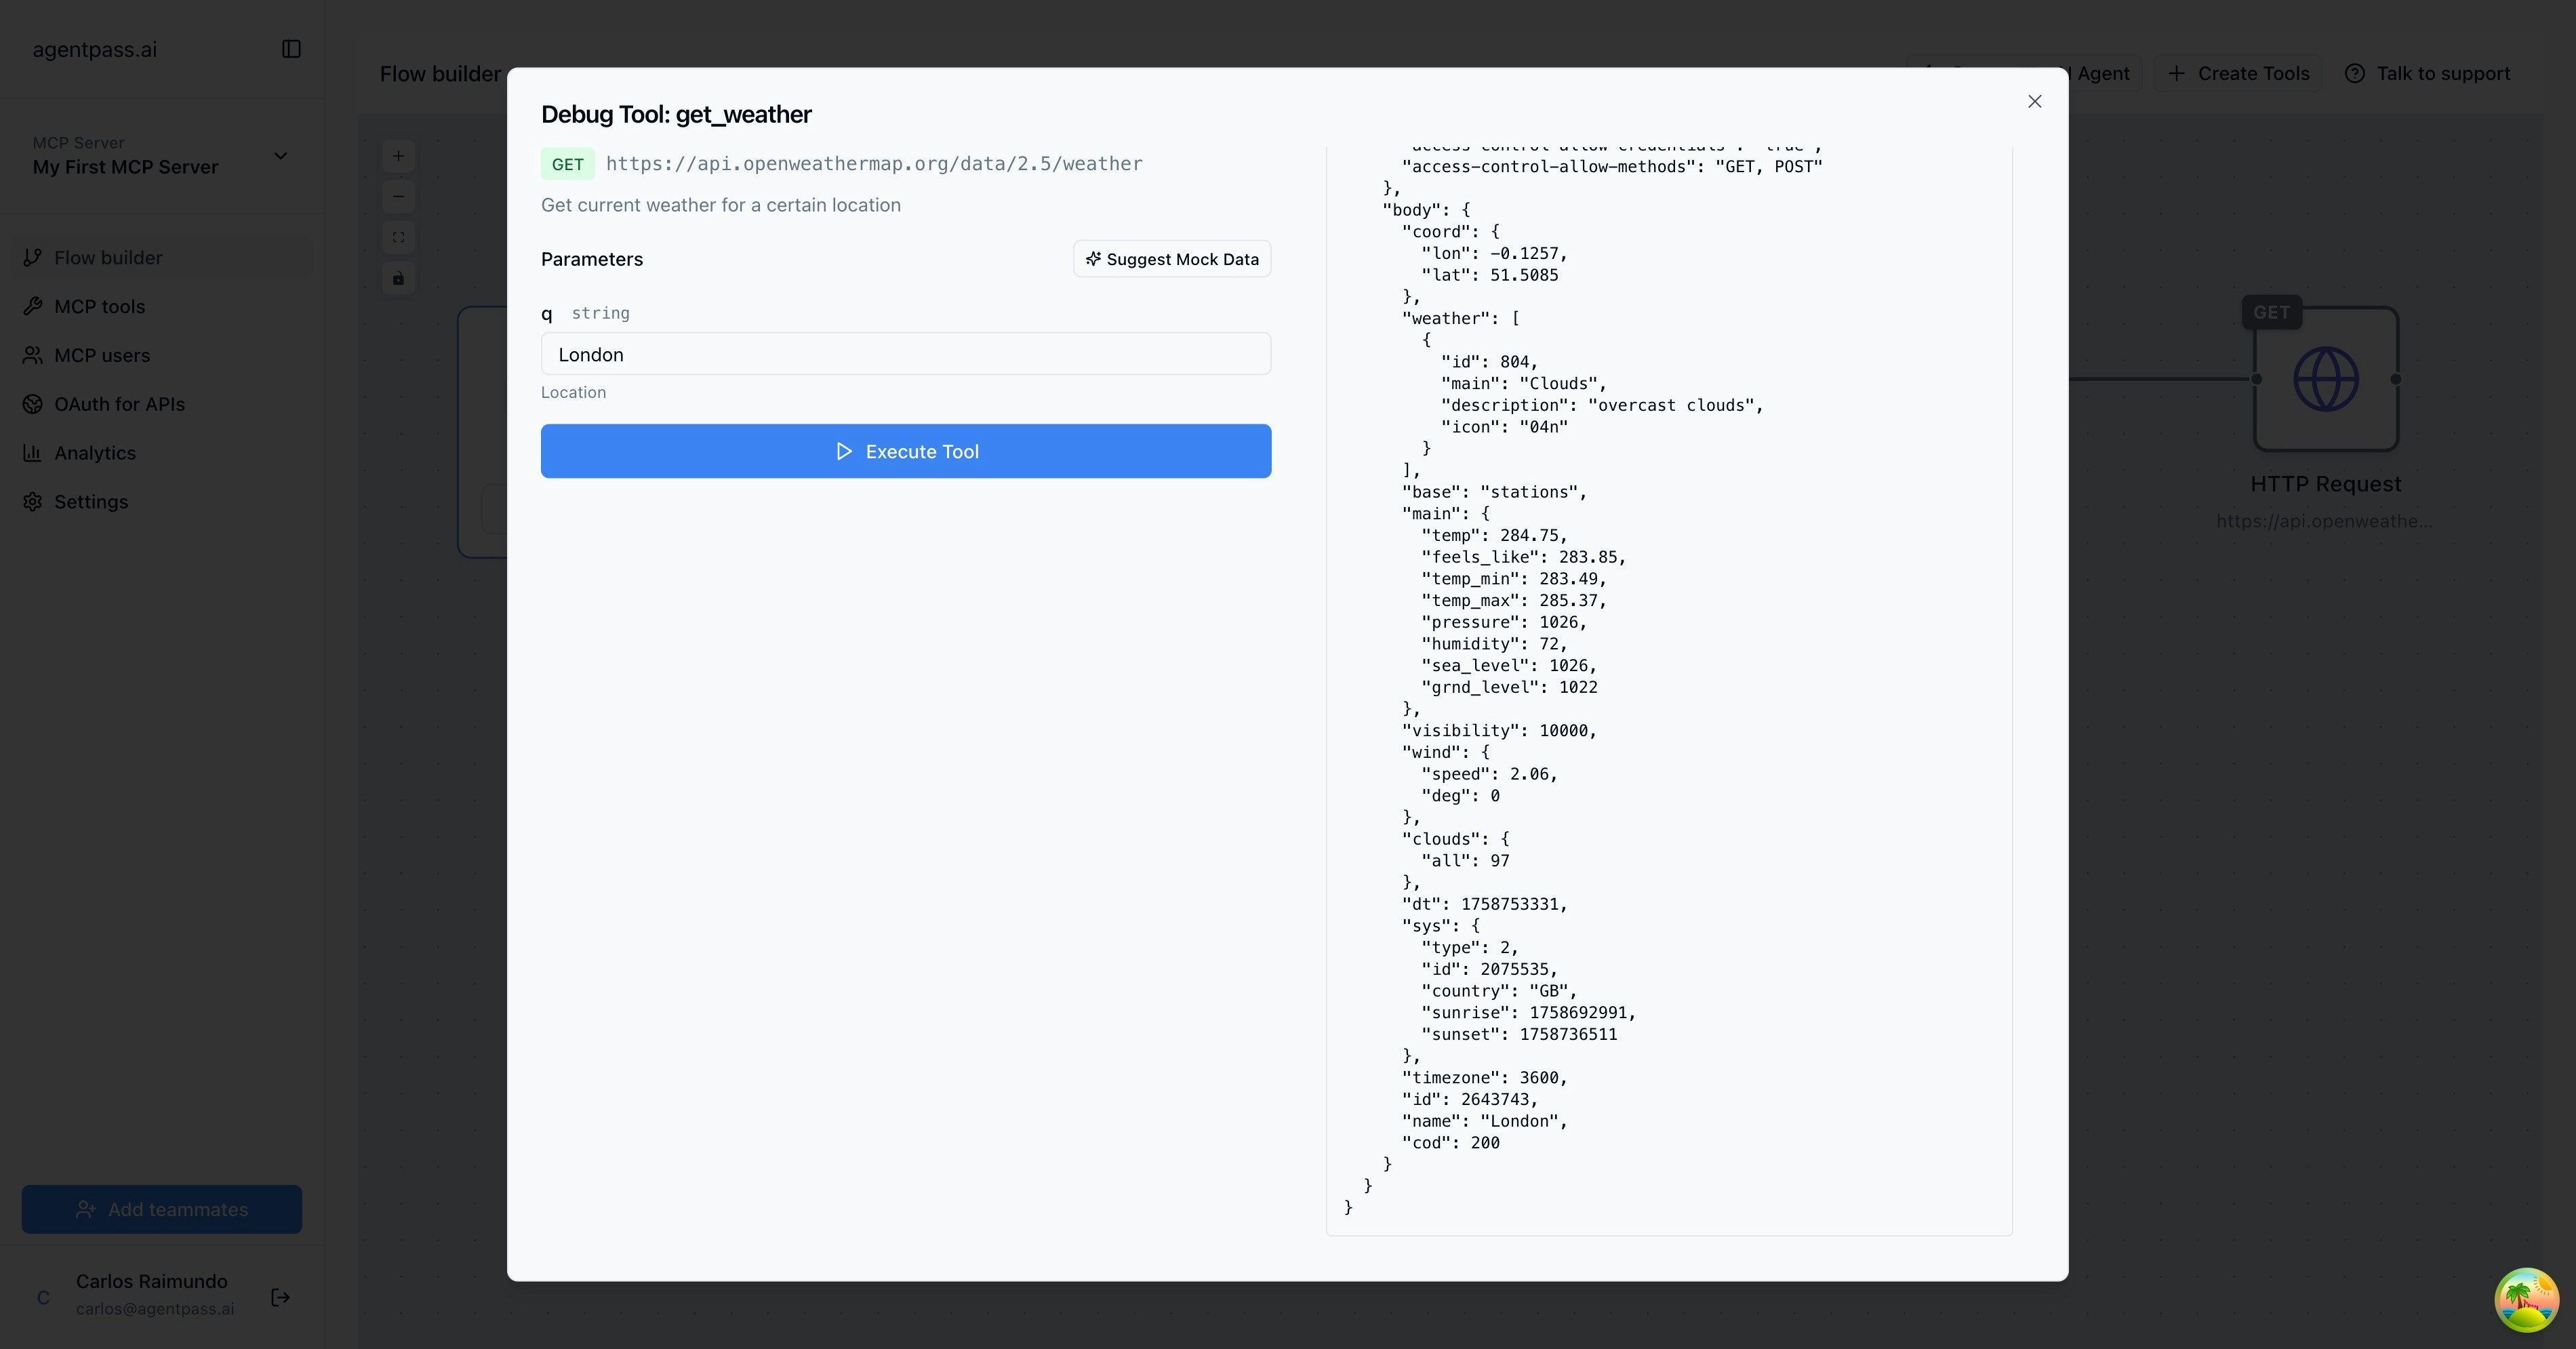
- Check the HTTP status code
- Review the response data
Congratulations! You’ve successfully created and tested your first MCP tool.
Bonus Step: Connect an AI Agent
1
Choose Your AI Tool
In the flow builder, in the AI Agent node,click “Connect”
2
Follow Integration Guide
Follow the specific integration guide for your chosen AI tool to add the MCP server connection.
3
Test the Integration
In your AI tool, try asking it to use your weather tool:
Need Help?
- Visit our concepts guide to understand MCP fundamentals
- Check out specific feature guides in the documentation sidebar
- Contact support@agentpass.ai for technical assistance